Shibori Folding Techniques: A Comprehensive Guide
Shibori, a Japanese resist dyeing technique, showcases diverse folding patterns like galaxy, diamond, and square folds, offering creative textile design possibilities․
The core principle relies on manipulating fabric—compressing it into wrinkles or folds—to resist dye penetration, creating unique and beautiful designs․
Shibori emphasizes the interaction between dyeing processes and fabric manipulation, utilizing binding, stitching, folding, twisting, and compressing methods․
Exploring shibori provides a rewarding crafty challenge, blending rich history, intricate techniques, and endless creative expression through textile art․
Shibori, originating from the Japanese verb shiboru – meaning to wring, squeeze, or press – is an ancient resist dyeing technique yielding captivating textile patterns․ Unlike simply applying dye to cloth, shibori involves meticulously manipulating the fabric through folding, twisting, stitching, compressing, and binding before the dyeing process․ This manipulation creates areas that resist the dye, resulting in intricate designs․
Historically rooted in Japan, shibori isn’t tied to India, despite similar resist-dyeing traditions existing globally․ The beauty of shibori lies in its versatility; it’s less about a single technique and more about the dynamic interplay between the dyeing process and the fabric’s physical properties․ Even simple compression into wrinkles or folds can resist dye penetration, forming the basis for stunning visual effects․
This guide delves into the world of shibori, exploring various folding techniques and offering a comprehensive overview for beginners and experienced textile artists alike․ Prepare to unlock a realm of creative possibilities!
The History of Shibori
Shibori’s origins trace back centuries in Japan, with evidence suggesting its practice as early as the 8th century․ Initially, it was a practical method for mending and reinforcing cloth, evolving into a sophisticated art form embraced by both commoners and nobility․ During the Nara period (710-794), shibori was utilized for decorative purposes, particularly in Buddhist textiles․
Over time, distinct regional styles of shibori emerged, each characterized by unique techniques and aesthetic qualities․ These styles reflected local materials, cultural influences, and the expertise of artisans․ The technique flourished during the Edo period (1603-1868), becoming integral to kimono design and everyday garments․
While shibori remained largely within Japan for centuries, it gained international recognition in the 20th century, inspiring textile artists worldwide․ Today, it continues to be celebrated as a testament to Japanese craftsmanship and a vibrant expression of artistic innovation․
Shibori vs․ Tie-Dye: Understanding the Differences
Although often compared, shibori and tie-dye are distinct resist-dyeing techniques․ Tie-dye, originating in various cultures globally, typically involves binding, twisting, or crumpling fabric and applying dye, resulting in more freeform and often bolder patterns․ Shibori, rooted in Japanese tradition, emphasizes precise folding, stitching, and binding methods to create intricate and controlled designs․
A key difference lies in the level of precision․ Shibori often requires meticulous planning and execution, yielding complex geometric or organic motifs․ Tie-dye tends to be more spontaneous and improvisational․ Furthermore, shibori frequently utilizes indigo dyeing, while tie-dye encompasses a wider range of dye colors․
Essentially, shibori is a more refined and structured approach to resist dyeing, while tie-dye offers greater artistic freedom and a more casual aesthetic․
Core Shibori Folding Techniques
Shibori encompasses diverse techniques—Arashi, Itajime, Kumo, and Nui—each utilizing unique folding, binding, and stitching methods to create stunning textile patterns․
Arashi Shibori (Pole Wrapping)
Arashi Shibori, translating to “storm-patterned,” is a dynamic technique involving wrapping fabric tightly around a pole, creating a wildly textured design․ This method is renowned for its unpredictable, organic patterns resembling crashing waves or swirling storms, hence the name․
The process begins with securing one end of the fabric to a pole – traditionally a PVC pipe works well – and then spiraling the material around it, maintaining consistent tension․ Once fully wrapped, the fabric is tightly bound with string or thread at regular intervals, compressing the folds and defining the pattern․
This compression is crucial, as it resists dye penetration, resulting in a striking contrast between dyed and undyed areas․ The resulting patterns are often linear and jagged, reflecting the wrapping and binding process․ It’s a relatively simple technique, making it accessible for beginners, yet capable of producing complex and beautiful results․
Materials Needed for Arashi Shibori
To embark on your Arashi Shibori journey, gathering the right materials is essential․ Firstly, you’ll need a length of fabric – cotton, silk, or linen work beautifully, with lighter weights yielding more dramatic results․ A cylindrical pole, such as PVC pipe (approximately 1-2 inches in diameter and your fabric’s length), is crucial for wrapping․
Strong string or thread, like cotton or polyester, is needed for binding the wrapped fabric, ensuring secure compression․ Dye, preferably fiber-reactive dye for vibrant and lasting color, is also necessary․ Additional supplies include rubber bands for securing ends, gloves to protect your hands, and a container for dyeing․
Optional, but helpful, items include a drop cloth to protect your work surface, and a measuring tape for consistent wrapping and binding intervals․ Having these materials prepared beforehand streamlines the process and enhances your creative experience․
Step-by-Step Arashi Shibori Process
Begin by cutting your fabric to the desired length and wrapping it tightly around the cylindrical pole, ensuring even distribution․ Next, secure one end of the fabric with a rubber band․ Then, begin wrapping the fabric with string, creating random, irregular pleats as you move along the pole – this is where the ‘arashi’ or storm-like pattern emerges․
Continue wrapping and binding tightly with string, maintaining a consistent tension․ Secure the other end with a rubber band․ Once fully wrapped, prepare your dye bath according to the dye manufacturer’s instructions․ Submerge the wrapped fabric into the dye, ensuring complete coverage․
Allow the fabric to dye for the recommended time, then rinse thoroughly with cold water until the water runs clear․ Finally, remove the string and pole, revealing your stunning Arashi Shibori creation!
Itajime Shibori (Shape Resist)
Itajime Shibori, translating to “pounding resist,” utilizes shaped objects to create patterns․ This technique involves placing fabric between wooden blocks, plastic shapes, or even found objects, then binding tightly․ The areas shielded by the shapes resist the dye, resulting in striking negative-space designs․
The beauty of Itajime lies in its versatility; any shape can be used, from simple geometric forms to intricate cutouts․ Careful placement and secure binding are crucial for clean, defined patterns․ This method offers a controlled approach to resist dyeing, allowing for precise design execution․
Itajime Shibori is a fantastic entry point into the world of resist dyeing, offering immediate and visually appealing results with relatively simple materials and processes․
Utilizing Shapes for Itajime Shibori
Itajime Shibori’s core lies in the shapes employed – wooden blocks are traditional, but plastic, acrylic, or even cardboard can work effectively․ The key is a smooth, non-porous surface to prevent dye bleed․ Shapes can be purchased or handcrafted, offering limitless design possibilities․
Geometric forms like squares, triangles, and circles create classic patterns, while custom-cut shapes allow for personalized motifs․ Consider the shape’s complexity; intricate designs require tighter binding․ Experiment with layering shapes for overlapping patterns and depth․
Proper shape placement is vital; ensure they’re firmly pressed against the fabric before binding․ The tighter the binding, the sharper the resulting design․ Explore combining different shapes and sizes for dynamic compositions․
The Itajime Shibori Dyeing Process
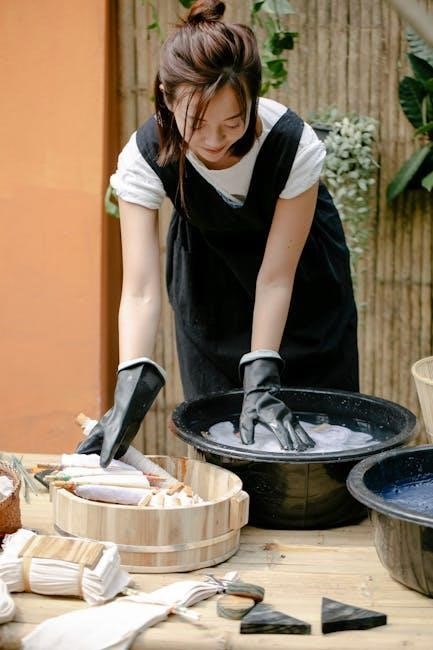
Itajime Shibori’s dyeing process begins with preparing the dye bath – indigo is popular, but other dyes work well․ Submerge the fabric, ensuring complete coverage, and allow sufficient dye absorption time, typically 10-20 minutes, depending on desired intensity․
Gentle agitation helps even dye distribution, but avoid excessive movement that could shift the shapes․ Once dyed, carefully remove the fabric and rinse thoroughly in cold water until the water runs clear, removing excess dye․

Finally, remove the shapes to reveal the stunning resist pattern․ Wash the fabric gently with mild detergent and dry flat․ The resulting design showcases crisp, defined lines, a hallmark of Itajime Shibori’s unique aesthetic․
Kumo Shibori (Spider Web)

Kumo Shibori, translating to “spider web,” creates a captivating, radial design․ This technique involves pinching and twisting the fabric, then binding it tightly with thread or string at regular intervals, resembling a spider’s web․
The binding creates areas of resist, preventing dye penetration and resulting in a unique, cracked pattern when the bindings are removed․ The density of the binding and the fabric’s pleating influence the final design’s intricacy․
Experimentation with binding techniques and fabric types yields diverse results, from delicate, subtle webs to bold, dramatic patterns․ Kumo Shibori is a versatile technique, offering endless creative possibilities for textile artists․
Creating the Kumo Shibori Pattern
Creating a Kumo Shibori pattern begins with gathering your fabric and binding materials – thread or string works well․ Pinch a small section of fabric and gently twist it, forming a circular shape․ Secure this twisted point tightly with your binding material․
Continue making small pinches and twists around the central point, radiating outwards like spokes on a wheel․ Bind each twist securely, maintaining consistent tension․ The closer the bindings, the more intricate the web-like pattern will become․
Once the entire fabric section is bound, you’re ready for dyeing․ The bound areas will resist the dye, revealing the distinctive spider web design upon removal of the bindings․ Experiment with different binding densities for varied effects․
Nui Shibori (Stitched Resist)
Nui Shibori, translating to “stitched shibori,” is a technique where the fabric is intricately stitched, then pulled to create texture and resist areas during dyeing․ This method allows for highly customized and detailed designs, unlike simpler folding techniques․
Basics involve creating patterns with running stitches on the fabric surface․ These stitches are then pulled tightly, causing the fabric to gather and shrink, forming a three-dimensional effect․ The tighter the stitches and the stronger the pull, the more pronounced the resist․
The stitched areas prevent dye penetration, resulting in unique patterns․ Nui Shibori is often used to create complex motifs and textures, demanding patience and precision for stunning results․
Basics of Nui Shibori Stitching
Nui Shibori stitching fundamentally relies on creating a network of running stitches on the fabric, acting as the resist mechanism․ Typically, a strong thread, like cotton or polyester, is used to ensure durability during the pulling process․ Stitch length and density directly influence the final pattern’s appearance․
Beginners often start with simple geometric designs, practicing consistent stitch spacing․ Once stitched, the thread is carefully pulled, gathering the fabric and creating the desired texture․ The fabric will naturally shrink and distort, forming unique shapes․
Securing the gathered fabric with additional stitches or ties prevents unraveling during dyeing․ Mastering basic stitch techniques unlocks the potential for intricate and personalized Nui Shibori creations․
Variations in Folding & Manipulation
Shibori offers diverse folding techniques, including scrunch, accordion, and wave folds, allowing for unique textile designs and creative exploration of fabric manipulation․
Scrunch Shibori (Shibori Crumple)
Scrunch Shibori, also known as Shibori Crumple, represents one of the most accessible and forgiving entry points into the world of resist dyeing․ This technique doesn’t demand precise folding or elaborate setups, making it ideal for beginners eager to experiment with the fundamental principles of shibori․
The process involves simply crumpling the fabric—often cotton or silk—into a random, organic shape․ This creates a multitude of small, irregular pleats and folds․ Once scrunched, the fabric is securely bound with string, rubber bands, or even simple ties․ The tighter the binding, the more pronounced the resist effect will be during the dyeing process․
The beauty of Scrunch Shibori lies in its unpredictability; each piece is uniquely patterned, showcasing a captivating interplay of light and dark areas․ It’s a fantastic method for achieving textured, abstract designs, and a wonderful way to understand how fabric compression influences dye absorption․
Simple Scrunch Folding Method
Implementing the Simple Scrunch Folding Method begins with preparing your fabric – cotton works exceptionally well․ Lay the fabric flat and begin randomly gathering it, creating a loose, uneven crumple․ Think of it as intentionally creating a chaotic texture․ Avoid overly structured folds; the goal is organic irregularity․
Once you have a substantial crumple, secure it tightly with rubber bands or string․ Wrap the binding around the entire mass of fabric in various directions, ensuring the folds are compressed․ The more binding you use, the more defined the resist pattern will become․
This method’s simplicity is its strength․ It requires no special skills or tools, making it perfect for beginners․ The resulting patterns are wonderfully unpredictable, offering a unique aesthetic with each attempt․ Experiment with different binding techniques and fabric types to explore the range of possibilities․
Accordion Folding Techniques
Accordion folding, a cornerstone of Shibori, involves precisely folding fabric back and forth, resembling the bellows of an accordion․ This technique creates linear patterns and offers versatility in design․ Begin by folding the fabric in one direction, creating a sharp crease․ Then, reverse the fold, creating another crease parallel to the first․
Continue this process, alternating fold directions, until the entire fabric is neatly pleated․ The tighter the folds, the more defined the resulting pattern will be․ Secure the folded fabric with rubber bands or string to maintain the pleats during the dyeing process․
Accordion folds serve as a base for more complex patterns, like diamond or square folds, offering a foundation for intricate textile designs․ Mastering this fundamental technique unlocks a world of creative possibilities within Shibori․
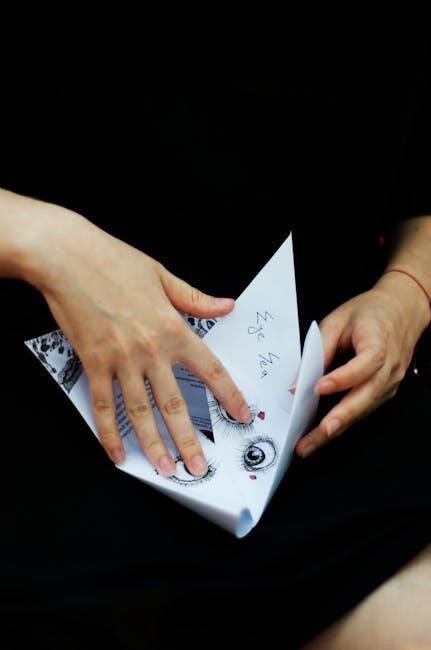
Diamond Fold (Triangle Accordion)
The Diamond Fold, a variation of the accordion technique, creates a striking triangular pattern․ Begin with a square piece of fabric and fold it in half diagonally, forming a triangle․ Continue folding the triangle in half repeatedly, creating increasingly smaller triangles․ Ensure each fold is crisp and precise for a well-defined diamond pattern․
Once the fabric is sufficiently folded, secure it tightly with rubber bands or string at regular intervals․ This prevents the folds from shifting during the dyeing process․ The density of the folds influences the intensity of the pattern; tighter folds yield bolder diamonds․
This technique is excellent for creating geometric designs and adds a dynamic visual element to textiles․ Experiment with different fabric types and dye colors to achieve unique and captivating results․
Square Fold (Layered Squares)
The Square Fold, also known as Layered Squares, involves creating a grid-like pattern through precise folding․ Start with a square piece of fabric and fold it into smaller squares, resembling a grid․ Each fold should be neat and aligned to ensure a consistent pattern․ The size of the squares determines the final design’s scale․
After achieving the desired grid, secure the folds tightly with string or rubber bands, binding across the layers․ This prevents dye from penetrating the folded areas, creating a contrasting pattern․ Varying the tension of the binding can influence the final result, offering subtle design variations․
This technique is ideal for producing geometric designs and offers a structured aesthetic․ Experiment with different fabric weights and dye colors to explore diverse visual effects․
Wave Fold Techniques
Wave Fold Techniques aim to mimic the organic flow of water, creating dynamic and visually appealing patterns on fabric․ This method involves pleating the fabric in a series of undulating waves, resembling ocean swells․ Achieving consistent waves requires careful manipulation and practice․
Begin by gently folding the fabric back and forth, creating a series of pleats․ Then, manipulate these pleats to form a wave-like pattern, ensuring the crests and troughs are evenly spaced․ Secure the folded fabric with string or rubber bands, binding along the wave’s length to maintain the shape during dyeing․
Experiment with varying the amplitude and wavelength of the waves to achieve different effects․ This technique is particularly effective with lightweight fabrics, allowing for greater fluidity in the folds․
Creating Wave Patterns with Folding
Creating wave patterns with folding in Shibori involves a delicate balance of pleating and manipulation․ Start by laying your fabric flat and initiating a series of accordion folds along one edge․ The key is to maintain consistent width in each fold, contributing to a uniform wave appearance․
Once the accordion folds are established, gently curve the fabric, transforming the straight lines into undulating waves․ Secure these waves at regular intervals using string or rubber bands, ensuring the folds remain in place throughout the dyeing process․ The tightness of the binding influences the sharpness of the resulting pattern․
Experiment with different binding techniques and fabric types to achieve varied wave effects․ Lighter fabrics will exhibit softer, more flowing waves, while tighter bindings create more defined crests and troughs․

Dyeing Processes for Shibori
Shibori dyeing utilizes techniques like indigo immersion, and innovative steaming methods with marbles or coins, manipulating fabric for unique shape and surface textures․
Indigo Dyeing in Shibori
Indigo dyeing holds a significant place within the world of shibori, deeply rooted in Japanese textile traditions and offering a stunning range of blue hues․ The process typically involves multiple dye baths, building up color intensity with each immersion, creating depth and variation within the patterns․
Fabrics are repeatedly dipped, oxidized (exposed to air), and rinsed, a cycle that sets the dye and develops the characteristic indigo shades․ This method allows for nuanced color gradients and subtle shifts in tone, enhancing the visual complexity of the shibori designs․
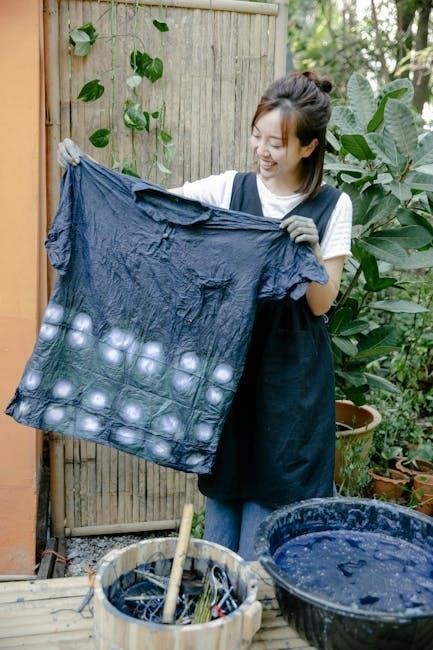
The contrast between the indigo-dyed areas and the undyed, resist-protected sections is what defines the beauty of this technique․ Achieving a rich, even indigo color requires careful control of the dye bath’s pH, temperature, and the duration of each dip, making it a rewarding yet demanding process for textile artists;
Steaming Shibori with Marbles
Steaming shibori with marbles presents a unique method for manipulating fabric and creating organic, circular patterns․ This technique involves strategically placing marbles within the folds of the fabric before steaming, allowing them to act as localized resists during the dyeing process․
The marbles prevent dye from penetrating the fabric in those specific areas, resulting in a distinctive speckled effect once the dyeing is complete․ This method is particularly effective when using reactive dyes, which require heat to set, making steaming an ideal application method․
The size and arrangement of the marbles influence the final design, offering a degree of control over the pattern’s density and distribution․ It’s a playful and accessible technique, perfect for beginners exploring the possibilities of shibori and surface design․
Steaming Shibori with Coins
Steaming shibori utilizing coins offers another fascinating approach to fabric manipulation for resist dyeing․ Similar to using marbles, coins are strategically positioned within the fabric folds before steaming, acting as miniature resists to prevent dye penetration in those localized areas․
This technique yields unique, small-scale circular or patterned impressions on the fabric, differing from the larger, more organic shapes achieved with marbles․ The type of coin—size, material, and even texture—can subtly influence the final design, adding another layer of creative control․
Like marble steaming, this method works exceptionally well with reactive dyes, benefiting from the heat-setting process of steaming․ It’s a simple yet effective way to introduce intricate details and textural elements into shibori projects․

Resources & Further Learning
Shibori tutorials, patterns, and beginner kits are readily available online, fostering exploration of this ancient art form and its diverse techniques․
Dive into online resources to expand your knowledge and find inspiration for unique textile creations through shibori dyeing․
Shibori Dyeing Tutorials
Numerous online tutorials comprehensively guide aspiring artisans through the captivating world of shibori dyeing, offering step-by-step instructions for various folding techniques․
These resources often demonstrate techniques like Arashi Shibori, showcasing fabric wrapping around a pole and securing it with string before dyeing, as seen in DIY Arashi Shibori guides․
Visual learners benefit from video tutorials illustrating scrunching and securing fabric for simple scrunch folding methods, providing a clear understanding of the process․
Many tutorials detail the essential supplies needed, from fabric and dye to poles, string, and protective gear, ensuring a smooth and successful dyeing experience․
Beginners can find introductory guides covering basic shibori principles and techniques, while more advanced tutorials explore intricate patterns and variations․
Exploring these tutorials unlocks a wealth of knowledge, empowering individuals to confidently experiment with shibori and create stunning, unique textile art․
Finding Shibori Patterns & Inspiration
A vast landscape of inspiration awaits those seeking shibori patterns, ranging from traditional Japanese designs to contemporary interpretations and innovative folding techniques․
Online platforms showcase diverse shibori creations, offering a visual feast of ideas for color palettes, pattern arrangements, and fabric choices, sparking creativity․
Pinterest and Instagram serve as excellent sources of inspiration, featuring countless shibori projects and tutorials shared by artists and enthusiasts worldwide․
Exploring textile art books and museum collections provides insight into the historical evolution of shibori and its cultural significance, enriching understanding․
Experimentation is key; combining different folding techniques—like diamond, square, and wave folds—yields unique and personalized patterns․
Drawing inspiration from nature, geometric shapes, or abstract art can further enhance shibori designs, resulting in truly captivating textile masterpieces․
Shibori Kits for Beginners
For newcomers to the art of shibori, specialized kits offer a convenient and accessible entry point, providing all necessary materials and instructions․
These kits typically include pre-cut fabric pieces, dye powders, rubber bands, string, wooden poles, and detailed step-by-step guides for various techniques․
Arashi shibori kits are particularly popular, enabling beginners to master pole wrapping and create stunning, dynamic patterns with relative ease․
Itajime shibori kits often feature wooden shapes and clamps, facilitating the creation of precise and geometric designs on fabric surfaces․
Kits streamline the process, eliminating the need to source individual components, and ensuring a successful first shibori experience․
Exploring different kit options allows beginners to experiment with various techniques and discover their preferred style of shibori artistry․